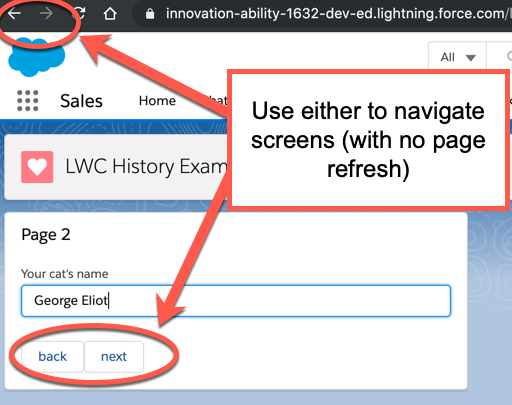
This article covers how to integrate a browser’s Back and Forward buttons with a Lightning web component without invoking a full page refresh. This is done by analyzing a wizard component built-in LWC that can navigate between screens using both the component’s and browser’s navigation buttons.
NOTE: This blog post was written before I found out about the lightning-navigation‘s state manipulation functionality. If the lightning-navigation‘s state manipulation functionality suits your needs for integrating the browser’s navigation buttons into your Lightning web component, I recommend using that approach instead of the one outlined here. This post will cover how to implement similar functionality in LWC using native Javascript APIs, which may be useful in cases where lightning-navigation may not work for integrating the browser’s navigation buttons (e.g., Communities).
Example
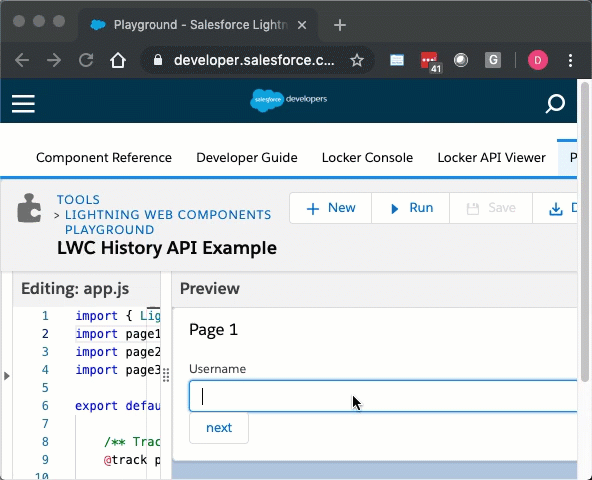
Take a few minutes to check out the example application on the Lightning Web Components Playground.
You can also find the code on GitHub along with instructions to build/install the application, but viewing it on the Lighting Playground will get you up and running much faster.
The Render Lifecycle Hook
See my article on the Render Lifecycle Hook if the code inside the example application’s render() method and related imports look foreign to you.
The History API
To understand the example, it is important to understand the browser’s History API.
The browser keeps a historical list of websites a user visits during a session. This list is what the browser inspects to determine what to load when the browser’s Back or Forward button is pressed.
In addition to storing the URLs in this historical list, the browser can store a few other things (like form data, title, scroll position, etc). One of which is a serialized JavaScript object referred to as the State Object.
The History API provides methods to manipulate the state object.
Using the History API.
The example application makes use of the History API in a few places
/**
 * Pushes the state of the component (the page number) as an entry to the
 * browser's history.
 */
_pushState() {

    /* The Lightning platform or other components may also be
        using the state object. A copy is created so no existing data
        is lost  */
    const state = Object.assign({}, history.state);
    state.pageNumber = this.pageNumber;
    history.pushState(state, '');
}
The application calls this method whenever the page number changes due to pressing of the component’s (not the browser’s) “Next” or “Previous” buttons.
This method is responsible for pushing a new entry to the top of the browser’s history list. This is done by using the History API’s history.pushState() method. By putting an entry on the top of the history list, it becomes the entry that represents the current state of the page.
For example, if a user on-screen one of the wizard presses “Next”, the application will update the pageNumber property to 2 and then call the above code snippet which pushes a new history entry to the top of the list with a state of {'pageNumber' : 2, ...}.
/**
 * Sets a handler to handle browser Back and Forward button clicks, and
 * other browser navigation events.
 */
_setOnPopStateHandler() {
    window.onpopstate = (ev) => {
        // get the state for the history entry the user is going to be on
        const state = ev.state;
        if(state && state.pageNumber) {
            this.pageNumber = state.pageNumber;
        }
    };
}
This method is called upon the component’s initialization by the connectedCallback() lifecycle hook. It is responsible for setting the window.onpopstate event handler.
The popstate event is fired when a user presses the browser’s Forward or Back buttons to navigate between history entries for the same document (e.g., history entries created using history.pushstate from the previous code snippet). When navigating between history entries for the same document, a full-page reload does not occur.
The event’s attributes contain the state object for the history entry that the user is navigating to. This is used to update the internal state of the component.
To continue with the previous example where the user is now on screen two of the wizard, if the user now presses the browser’s Back button, the popstate event will be thrown and the code shown in the above snippet will bring the user back to screen one.
Note: the popstate event is not thrown when the current history entry is changed via history.pushState() or history.replaceState().
/**
 * Replaces the current history entry with an entry containing the
 * component's current state (the page number).
 */
_replaceState() {
    /* The Lightning platform or other components may also be
        using the state object. A copy is created so no existing data
        is lost  */
    const state = Object.assign({}, history.state);
    state.pageNumber = this.pageNumber;
    history.replaceState(state, '');
}
The _replaceState() method is similar to _pushState() but instead of pushing a new entry into the history, it replaces the entry the user is currently on. This is used when the component is loaded for the first time to set the initial state.
But What About URL Parameters?
What this example doesn’t do is store state as part of the URL, as in the following examples.
- /myPage?pageNumber=1
- /myPage#pageNumber=1
- /myPage/pageNumber/1
Storing state is part of the URL is useful if you want to be able to share the URL or bookmark the page.
While the History API allows for this type of behavior, I found using it in the Lightning Experience environment causes unexpected problems, and involves extra work and risks.
See the History API documentation for more information on URL manipulation functionality.
Other Notes
- This example, exposes the wizard as a standalone component in a Lightning app page. This was to keep things simple for demonstrative purposes. However, the component will work fine in most other contexts such as a Lightning record page.
- The History API is supported by Locker Service’s
SecureWindowwrapper and the code in this article was tested in a Locker Service restricted environment. At the time of writing this blog, everything worked as expected.
Conclusion
Now you know how to use the History API to integrate the browser’s navigation buttons into your Lightning web component! Please post your questions and feedback in the comments.